3D Fabric Decoupage Ornament

Hello all,
It's hard to find time to play when you're an adult, but this time of year always seems like a good excuse and opportunity to do that, so... go on, play a little and forget your troubles!
If you're at all into geometry and live surrounded by fabric, like myself, you'll love this little project. It's great fun to make.
Start by printing the free template here
I printed this at 100% scale on 160gsm paper. Thicker paper would work, too, but any thinner and it might struggle to hold it's shape. This template will give you an ornament that's just under 13cm (5") in height. You can increase/decrease the scale as you wish for different sizes.
Cut out the template and a piece of fabric slightly bigger than the template to use later.

I used the edge shaper end of my Clover point turner to score the lines before folding.

This helps you get those sharp and precise edges. Using a butter knife will get you the same results.

Fold on the scored lines. A roller is a really good tool to get those folds just perfect if you've got one, although finger-pressing will do just fine.


You can see it taking shape already.

Once you've got all the edges scored and folded, place the template flat and brush Mod Podge (or other decoupage glue) to cover the whole outer surface area. You can find this in lots of craft stores.
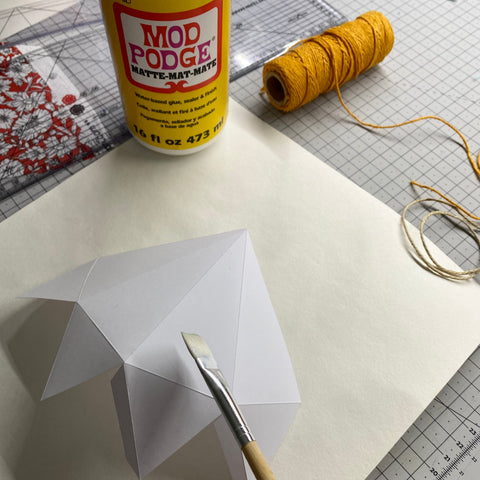

Place the fabric on top, right side up and press it down well. I used the roller again to flatten away any bubbles.

Turn over and trim the excess fabric.

As the glue dries, make sure to reshape all the edges so they don't dry completely flat again.

Once the fabric is dry and glued to the paper, brush a layer of Mod Podge on top.

Cover the whole surface and leave to dry. This will dry clear.

Again, make sure to reshape the edges as it dries.

Once completely dry, it's ready to be formed into the intended ornament shape. Brush some glue onto the flaps and press the corresponding edges on top. Knot a piece of string to form a loop and place the knot inside the top point of the ornament before glueing the last segment shut. I also put a little bell on the bottom point of one and some beads on the other two. Customise as much as you wish.

You can use tiny pieces of fabric to cover these ornaments as well, instead of one piece that covers the whole thing. It's perfect for using colourful scraps not big enough for anything else. It's what I did with the one on the right down here. I have to say, the plain fabric one was nowhere near as successful as the patterned ones, so i would not recommend it.

Tip: if no fabric available or even desirable, just draw/paint whatever you like on the blank side before folding and glueing it together. Great to do with kids.
I hope you enjoy making these, and if you do please tag with #DDornament on your socials.
Have fun and take care out there, Dhurata x