
Inverting a normal map in Blender
Last Updated on 7. January 2022 by Victor Karp
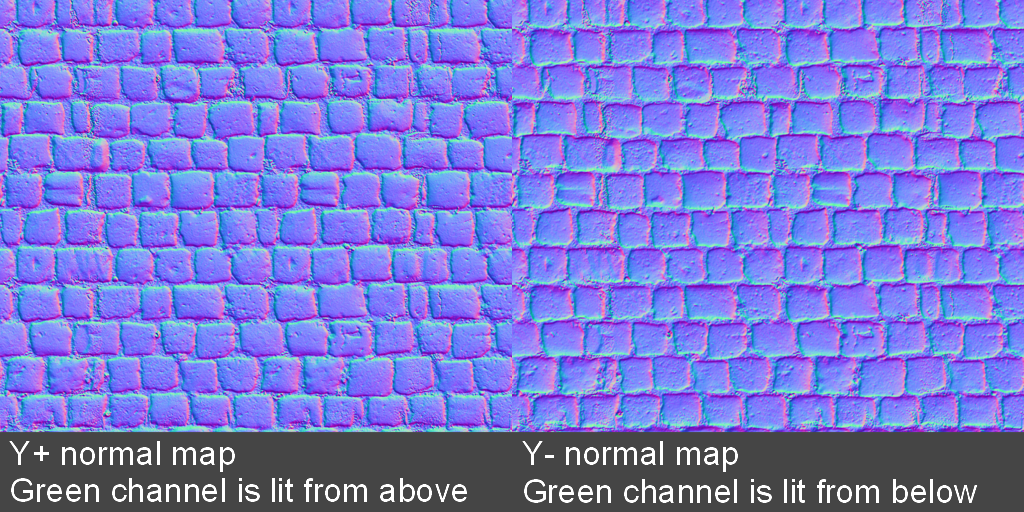
Y+ and Y- normal maps
Some applications like the Unreal Engine 4 use Y- normal maps, which means the green color channel of these normal maps looks as if it was lit from below. Blender on the other hand uses Y+ normal maps, where the green channel looks like it was lit from above.
If you use a Y- normal map in Blender, you need to invert the green channel or the shading of your map will look wrong. You don’t have to change your normal map texture for this, the flipping can easily be done in Blender’s shader editor.
Blender’s shader editor
The fastest way to open the shader editor is by clicking on the Shading tab in the button row above your 3D viewport. Your viewport is in the Layout tab by default. If your mesh does not yet have a material assigned to it, select your mesh, then click on the New button in the shader editor’s header. A new material with a Principled BSDF shader will be created.
The new material is represented by nodes in the shader editor. Press Shift+A to open the Add menu and add three nodes:
- Texture -> Image Texture
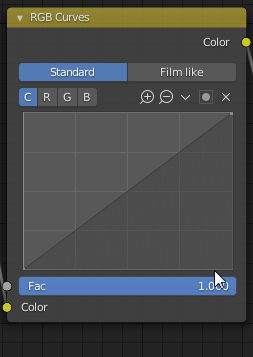
- Color -> RGB Curves
- Vector -> Normal Map
Load your normal map by clicking in the Image Texture node’s folder icon and browsing to your normal map texture. Switch the node’s Color Space from sRGB to Non-Color. Connect the nodes by dragging on the small circular dots like in the following picture:

Inverting the green channel
Now select the RGB Curves node’s green channel by clicking on the G button. Move the point in the lower left up and the one in the upper right down. This inverts the green channel’s colors. Here’s a GIF how changing the points works:
Your Y- normal map will now be rendered correctly inside Blender. Remember to always put the RGB Curves node before the Normal Map node and not after it.
Visit the Blender Tutorials main page for more Blender tutorials.